

The glamour of the 50's pin up girl has created an iconic, timeless look that never dates. It's irreverant, deeply glamourous, and sensual - with a giggle in its voice and a wiggle in it's walk.
It also celebrates femininity as a construct - waist-whittlers, make-up, hairstyles. The semiotics and signifiers of 'woman', which makes it lots of fun to play around with.
Perhaps that's why so many of us are still so interested in vintage pin-up girl looks and how to get them?

Recently, one of the make-up groups I joined on Facebook, which is a really lovely community of beauty enthusiasts, set a challenge to us all to create our own 50's pin-up girl look.
Of course, no one could resist the chance to dig out the rollers and the red lipstick and play a little dress up!
I had so much fun, I thought I would share the look on here and run through how to achieve it in just four simple steps.

Step One: A Flawless Base

The vintage vamp look is all about pale, flawless skin. Ideal for those of us that don't like tanning our faces. You're going to want to step away from the bronzer and anything with shimmer in. Forget strobing, the 50's pin up look is all about a matte finish.
To achieve this look, I started off with an application of Avon Magix Face Perfector. This is a highly mattifying product that leaves a smooth, poreless finish behind. A pea-sized blob smoothed on with fingertips does the trick.
After that, use a BeautyBlender or other foam sponge to stipple on a base of a medium coverage smoothing foundation. Here I used Chanel Lift Lumiere Firming and Smoothing Fluid Makeup. A couple of light coats will give an airbrushed finish.
To even out any shadows and dark circles, layer on a cream colour corrector, like Max Factor Colour Corrector Stick, and blend this out too.
To achieve a scupted skin finish with none of the shimmer, take a beige coloured contour or cream eyeshadow and carve out your cheekbones and jawline by swiping the colour into the areas your face is naturally shadowed. Then blend this out using the sponge also.
I used the Maybelline Color Tattoo cream shadow in 'Endless Beige' (from the Leather Effect collection).
Finally, set your handwork with a translucent powder, like No7 Perfect Light Loose Powder. This will keep your make-up in place and kill any remaining shine for that vintage matte finish.
Step Two: Eyes To Kill

Vintage vamp eyes are simple but deadly. The classic look is a pale, neutral lid with a light brown crease, black winged liner, and soft, fluttery lashes - and lots of them.
To get the look, I used shades from the Sleek i-Divine Palette in 'Oh So Special', and the Urban Decay Naked Basics kit.
Taking the lightest shade, 'Bow' from 'Oh So Special', I pressed it onto my lids and browbone using a fluffy brush. I then took the shade 'Venus' from Basics into the inner corners - it has a very slight shimmer, so it opens up the eye nicely.
Then, using a pointed shadow brush, I worked 'The Mail' and 'Naked 2' into the crease line, winging it out ever so slightly to elongate the eye and give it that upwards tilt.
Full, arched brows are also a must for this look. I brushed mine upwards and then drew in a strongly arched shape using Anastasia Dipbrow Pomade and a slanted brush. To give the brow a clean finish, I also outlined them using Benefit High Brow Glow
I then added a sweep of liquid liner - a thin line with a winged out upwards flick is the classic 50's look - using Makeup Gallery Pro Liquid Eyeliner. This stuff is ridiculously cheap, but its so long lasting and pitch black. The fine brush is perfect for getting a look like this.
For a full, feathery flutter, I curled my lashes and added a couple of coats of Benefit RollerLash (the packaging alone is enough to make you feel retro glam) followed by Esqido Luxury Mink Lashes in 'Lashlorette' - a really soft, feathery style.
Step Three: Crimson Lips

With lips, the only colour to go for is red and the finish is most definitely matte. You want a sculpted shape with a big emphasis on the curvy cupids bow.
To get the outline perfect, a lipliner or crayon product is a must. I used Lord and Berry Matte Lipstick Crayon to contour out my lips, and then added Mac Lady Danger on top. This is the perfect warm toned pillar box red for a popping vintage pout.
Step Four: Pinup Hair

Pin-up hair comes in lots of different styles, and some are more complicated and intricate than others. I kept my hair fairly simple, because I'm not brilliant at styling it.
To get the look, you can use heated rollers or a jumbo barelled curling tong. I opted for the BabyLiss Pro Ceramic tongs with the 24mm barrel.
Separate the hair into sections and use the barrel clip to create ringlet curls. On the front sections nearest the face, curl the hair towards your face only. This gives a more 'vintage' effect than flicking the curls out away from the face.
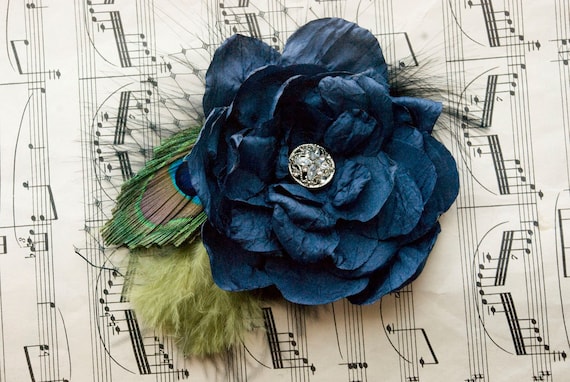
Then I created a couple of 'victory rolls' at the front, by rolling the curl in on itself to create a loop of hair, and pinning in place using kirby grips. I pulled back and pinned by hair behind one ear also, fixing a large navy feather hair accessory from Etsy in place.
Then of course, lashings of BlowPro Strong Hold Finishing Spray to hold the style in place.

And that's it - you can then host your very own vintage 50s pin-up girl photoshoot - even my cat wanted to get in on the act and photobomb me!
This look is perfect for any big occaision because it looks ultra-polish, and its surprisingly easy to achieve.
Are you a fan of vintage style? Have you tried any pin-up girl hair or make-up looks yourself? Let me know!


Love this kind of post<3 thanks for sharing
ReplyDeletefollow for follow?:)
xoxo
http://www.theclosetelf.com/